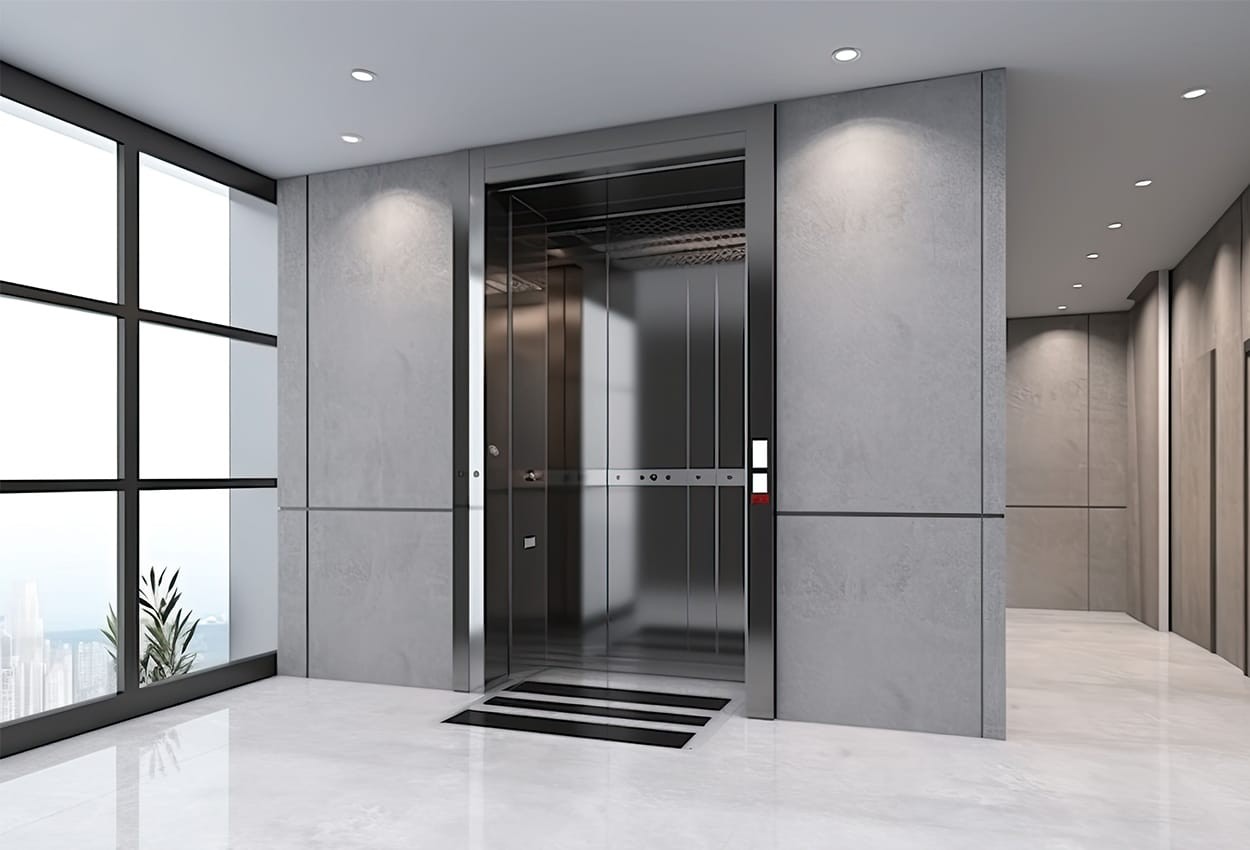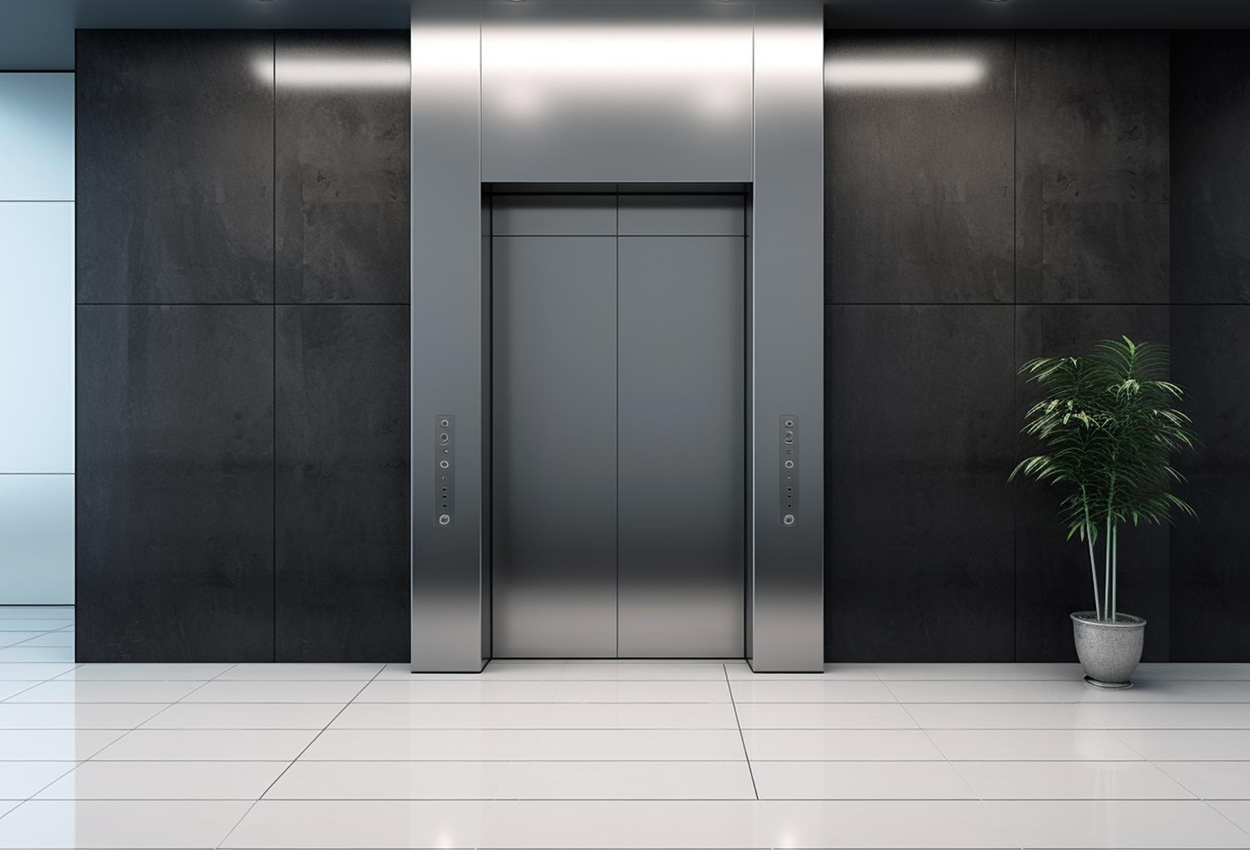

Installing a residential lift is a major architectural and structural addition to your property. Unlike standard home appliances, a home elevator cannot simply be delivered and plugged in; it requires a coordinated effort between your architect, civil builder, electrical contractor, and the elevator engineering team.
Whether you are retrofitting an older independent house in Basavanagudi or coordinating a new premium villa build in Whitefield, understanding the precise site preparation milestones and structural prerequisites will help you prevent construction delays and avoid costly design modifications.
This comprehensive guide breaks down the step-by-step installation process, critical civil and electrical preparation checklists, and how to successfully coordinate your residential lift installation in Bangalore.
⚡ Home Elevator Installation in Bangalore: Quick Answer
Installing a residential elevator typically takes 2 to 4 weeks for the physical mechanical and electrical assembly, while the entire end-to-end process (including site assessment, custom manufacturing, and civil preparation) spans 8 to 12 weeks.
- New Constructions: The elevator shaft is integrated directly into the house's blueprint, making the installation highly cost-effective and straightforward.
- Retrofits in Existing Homes: Requires fabricating an external structural steel-and-glass shaft or modifying an open-well staircase, extending the overall timeline.
Core Prerequisite: Homeowners must ensure a perfectly vertical shaft (within plumb line tolerances), a dry waterproofed pit (300 mm to 1000 mm depth), adequate top-floor headroom, and a dedicated electrical supply with power backup.
🛠️ Typical Installation Cost Snapshot
- New Construction Villa: ₹50,000 to ₹2,00,000 (excluding elevator equipment)
- Existing Home Retrofit: ₹2,00,000 to ₹8,00,000+ (depending on shaft construction requirements)
- External Steel & Glass Structure: ₹3,50,000 to ₹7,00,000+ (depending on height and finishes)
The Home Elevator Project Timeline
A successful residential lift project relies on structured phases. Below is the standard project roadmap illustrating the division of responsibilities between your local home builder and the elevator engineering team:
| Project Phase | Key Activities & Deliverables | Estimated Duration | Primary Responsibility |
|---|---|---|---|
| Phase 1: Site Evaluation | Structural feasibility check, shaft measurements, and engineering approval. | 1 – 2 Days | Lift Engineer & Architect |
| Phase 2: Custom Engineering | Engineering drawings finalized; cabin and drive assembly manufactured. | 4 – 6 Weeks | Elevator Manufacturer |
| Phase 3: Civil & Electrical Prep | Shaft construction, pit waterproofing, lifting hook placement, and power routing. | 2 – 4 Weeks | Home Builder / Contractor |
| Phase 4: Site Handover | Lift engineer audits shaft verticality, clearances, and electrical provisions. | 1 – 2 Days | Builder & Lift Engineer |
| Phase 5: Mechanical Assembly | Guide rail alignment, brackets mounting, motor installation, and cabin assembly. | 7 – 10 Days | Lift Installation Crew |
| Phase 6: Wiring & Calibration | Electrical wiring, control panel integration, and automatic safety limit tuning. | 3 – 5 Days | Lift Commissioning Engineer |
| Phase 7: Testing & Handover | Load safety tests, Emergency Rescue Device (ARD) drills, and customer briefing. | 2 – 3 Days | Quality Assurance Inspector |
Project Responsibility Matrix: Who Does What?
| Task / Deliverable | Primary Responsibility |
|---|---|
| Space Planning & Integration | Architect |
| Shaft Construction & Civil Works | Civil Contractor |
| Power Infrastructure & Dedicated Lines | Electrician / Electrical Contractor |
| Elevator Equipment Manufacturing | Elevator Manufacturer |
| On-Site Assembly, Calibration & Testing | Lift Installation Crew |
| Approvals, Liaisoning & Coordination | Homeowner & Installation Partner |
New Construction vs. Retrofitting an Existing Home
The overall complexity and cost of your installation depend heavily on your property’s stage of construction.
1. New Construction Installations (Planned Blueprints)
When designing a modern villa in developing residential hubs like Hebbal, North Bangalore, or Sarjapur Road, planning the elevator from the blueprint stage offers major structural advantages:
- Optimized Column Placements: The concrete (RCC) lift shaft acts as a load-bearing core element, integrated safely without disrupting neighboring rooms or foundations.
- Flawless Electrical Routing: Conduit pipes for single-phase or three-phase power lines are embedded inside walls during concrete pours, keeping cabling completely hidden.
- Aesthetic Symmetries: Floor cutouts and landing thresholds match the home's flooring materials precisely, creating seamless floor-to-floor transitions.
2. Retrofitting into Existing Residences (The Spatial Challenge)
Retrofitting an elevator into established independent homes in central neighborhoods like Jayanagar, Koramangala, or Indiranagar requires creative spatial planning:
- Open-Well Staircase Installations: If your staircase wraps around an open central well, this void is often the perfect candidate to house a compact glass-and-steel panoramic lift.
- Self-Supporting Steel Frame Shafts: When indoor spatial adjustments are impossible, engineers construct an external self-supporting structural steel tower against an exterior wall of the house, cutting door access holes directly through the existing masonry walls.
- Avoiding Structural Columns: Site surveys must locate and avoid load-bearing beams and foundation footings when digging the elevator pit to preserve the home's structural integrity.
Critical Civil & Site Requirements
Before finalizing shaft construction, review our Home Elevator Dimensions Guide to understand cabin sizes, shaft requirements, pit depths, and headroom clearances.
1. Shaft Plumb Line and Verticality
An elevator cabin travels along rigid steel guide rails. For the cabin to move smoothly without vibration, the shaft walls must be perfectly vertical.
The Tolerance Standard: The internal dimensions of the shaft must be uniform from the bottom of the pit to the roof slab. Engineers use a plumb line weight test to ensure the wall deviation is less than 15 mm to 20 mm across the entire height of a 3-story house.
Internal Shaft Finish: The interior walls of a brick or concrete lift shaft must be plastered smoothly and finished with water-based paint to prevent cement dust from settling on delicate mechanical switches and guide rail oils.
2. The Pit: Structural Depth and Waterproofing
The pit is the structural excavation located beneath the lowest served floor. It houses mechanical safety buffers, tension pulleys, and lower travel limit sensors.
Typical Depths: Residential hydraulic systems require a shallow pit depth of 100 mm to 300 mm, whereas gearless traction MRL elevators require a pit of 300 mm to 1000 mm to accommodate heavy-duty safety buffer cylinders.
Waterproofing is Mandatory: Because elevator pits are below-ground concrete structures, they are highly vulnerable to groundwater seepage, particularly during Bangalore’s monsoon seasons. Contractors must apply high-grade crystalline chemical waterproofing or membrane linings to prevent water accumulation, which can corrode safety cables and damage electronic components.
3. Vertical Headroom and Overhead Lifting Hooks
Headroom refers to the clear vertical clearance required from the finished floor of the top landing to the underside of the shaft roof.
Typical Heights: Hydraulic lifts operate efficiently with low top-floor headroom starting from 2600 mm to 3000 mm. Gearless Traction MRL lifts require a taller overhead space of 3000 mm to 3400 mm to safely house the compact traction motor.
The Structural Hook: A heavy-duty steel lifting hook (typically rated for a load capacity of 1000 kg to 1500 kg) must be cast into the center of the top concrete slab of the shaft. Installation crews use this hook to lift the heavy motor, counterweights, and structural cabin frame safely into place.
Electrical Infrastructure & Backup Requirements
Modern home elevators feature highly advanced electronics that demand reliable, clean electrical power.
Power Requirements
- Single-Phase (230V): Most modern compact residential lifts (2 to 4 passengers) run on standard household single-phase power, making them highly compatible with standard residential grids.
- Three-Phase (415V): Heavy-duty systems, larger 6-passenger lifts, or premium glass elevators with fast travel profiles generally require a dedicated three-phase power line to manage motor load efficiently.
- Dedicated Circuit Breaker: The lift power feed must route through a dedicated Distribution Board (DB) equipped with an independent Miniature Circuit Breaker (MCB) or Earth Leakage Circuit Breaker (ELCB) to prevent household appliance faults from tripping the elevator's safety systems.
Emergency Safety & Backup Systems
- Automatic Rescue Device (ARD): This is a mandatory safety system for modern residential lifts. In the event of a sudden power outage, an auxiliary battery pack activates automatically, supplying temporary backup power to glide the cabin smoothly to the nearest exit landing and retract the doors safely, ensuring no passenger is ever trapped inside.
- UPS / Home Inverter Compatibility: Modern, high-efficiency gearless traction lifts draw very low running currents. Homeowners can connect these systems to their standard home solar power grids or backup generator panels to ensure uninterrupted operation during local power cuts.
Home Elevator Pre-Installation Checklist
Before scheduling the physical assembly and technician deployment, verify that your civil builder and electrical contractor have completed the following site-readiness milestones:
- [ ] Shaft Dimensions Checked: Confirm the internal shaft width, depth, and structural verticality match approved engineering drawings at every floor landing.
- [ ] Pit Waterproofing Complete: Verify the concrete pit is fully waterproofed using chemical crystalline coatings to prevent groundwater seepage.
- [ ] Top-Floor Headroom Confirmed: Measure and confirm clear vertical height from the highest finished floor level to the underside of the top concrete roof slab.
- [ ] Dedicated Electrical Supply Ready: Route a dedicated single-phase or three-phase power line directly to the lift control panel zone.
- [ ] Power Backup Interfaced: Connect the elevator feed lines directly to your home inverter, solar grid, or automatic generator backup lines.
- [ ] Structural Lifting Hook Cast: Ensure a heavy-duty steel hook (rated for 1000 kg to 1500 kg) is securely cast into the center of the shaft ceiling slab.
- [ ] Shaft Internal Finish Applied: Verify the internal brick or concrete shaft walls are smoothly plastered and painted with a water-based finish to eliminate cement dust.
- [ ] Unobstructed Site Access Provided: Clear pathways from your home's main entrance to the shaft to allow the technicians to move heavy components safely.
- [ ] Landing Floor Thresholds Secured: Install secure safety barriers or barricades across all open landing cutouts on each floor.
- [ ] Handover Audit Approved: Conduct and pass a pre-installation structural inspection with your civil engineer and the elevator team.
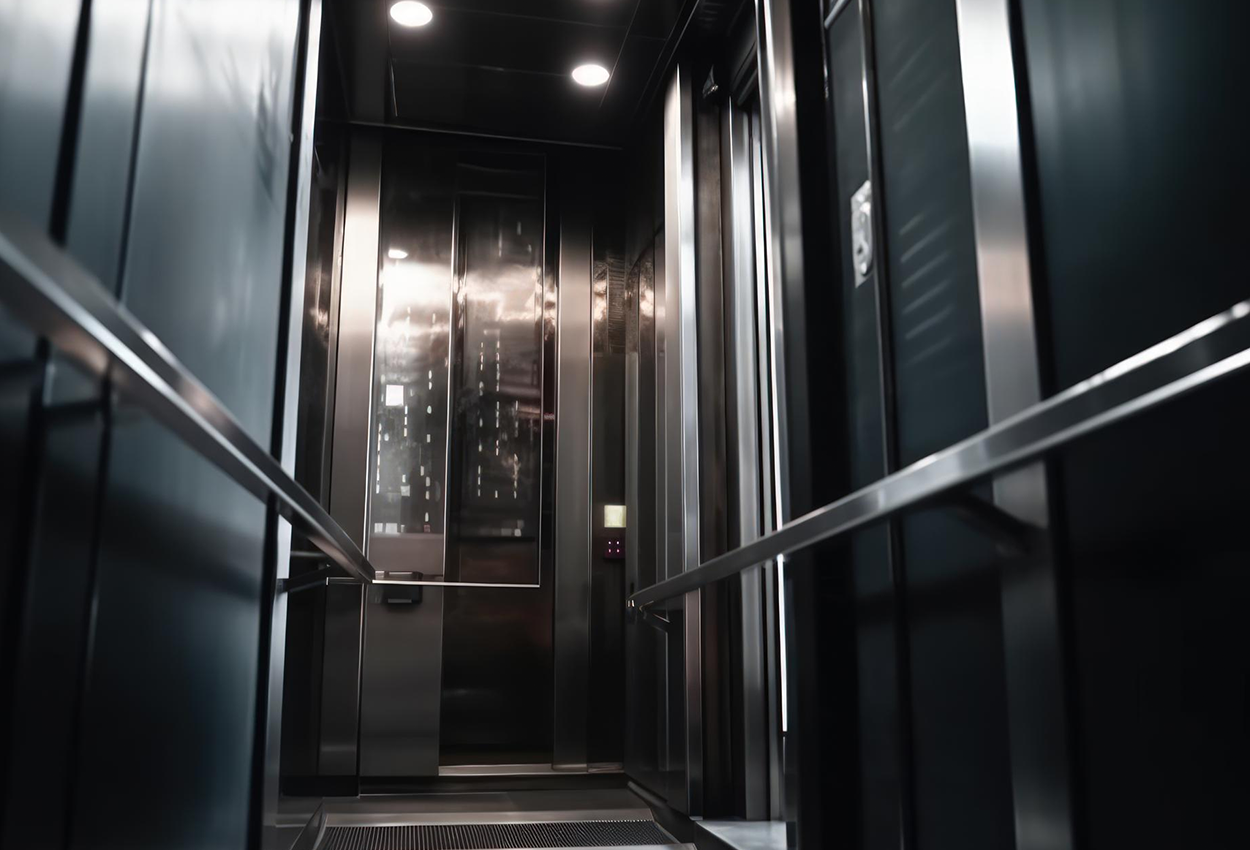
Steps in the Mechanical & Electrical Assembly
Once the civil builder hands over a clean, dry, and compliant shaft, the elevator installation technicians begin their work on-site:
- Plumb and Bracket Installation: Technicians drop high-tension plumb wires from the top of the shaft to the pit to establish reference points. Heavy-duty steel brackets are then anchored to the concrete walls.
- Guide Rail Assembly: Structural steel guide rails are mounted and aligned to the brackets with millimeter precision. Any misalignment here will result in a bumpy, noisy ride experience.
- Motor and Drive Integration: The gearless traction motor (mounted to the upper rail brackets in MRL setups) or the hydraulic cylinder and oil tank (placed in a small utility cabinet nearby) are installed and secured.
- Cabin Frame & Counterweight Assembly: The heavy-duty structural steel frame (sling) of the cabin and the counterweight frame are assembled. High-tensile steel cables or flat poly-coated belts are routed over the motor sheaves.
- Door Calibration: Landing doors on each floor and the primary cabin door operator are aligned, calibrated, and fitted with safety interlocks so the lift cannot move if any door is open.
- Electrical Harnessing and Commissioning: Technicians run safety circuits, travel cables, limit switches, and connect the primary controller board. The elevator is powered on, and engineers program the deceleration curves for smooth starting and stopping.
- Testing & Handover: Complete load safety test routines, emergency Automatic Rescue Device (ARD) drills, and provide a full functional briefing before handoff.
Related Home Elevator Resources
To plan your residential elevator project seamlessly, explore our specialized local guides:
- Home Elevator Cost in Bangalore (2026): Complete Pricing Guide
- Hydraulic vs. Traction Home Elevators: An Objective Engineering Guide
- Best Home Elevators in Bangalore: What to Look for Before You Buy
- Home Elevator Dimensions Guide: Sizing Up Your Shaft & Cabin
People Also Ask
Can a home elevator be installed in an existing house without a pre-built shaft?
Yes. If your property does not have an existing brick or concrete shaft, a self-supporting home lift can be installed inside a fabricated structural steel-and-glass framework. This structure can be positioned inside an open-well staircase or wrapped around an external wall, requiring minimal structural disruption.
How much space is required to install a home elevator?
Most residential elevators require a horizontal shaft footprint of 1200 mm x 1200 mm (for a compact 2-passenger lift) to 1700 mm x 1700 mm (for a spacious 6-passenger lift). Vertical requirements include a pit depth of 100 mm to 1000 mm and top-floor headroom clearance of 2600 mm to 3400 mm.
How long does the on-site elevator installation take?
Once the concrete shaft or steel frame is prepared, the actual mechanical installation, wiring, testing, and commissioning of a residential elevator typically take one to three weeks on-site depending on the number of floors.
Do home elevators require approval or licensing in Bangalore?
Approval requirements depend on your property type, height, and local municipal regulations (such as BBMP). In Karnataka, multi-unit buildings and certain heights require formal CEIG (Chief Electrical Inspectorate to Government) approvals. It is highly recommended to choose an installation partner that handles all regulatory paperwork and liaisoning.
Can a residential lift operate during a power outage?
Yes. Modern home elevators come equipped with an Automatic Rescue Device (ARD). During a power failure, this battery-operated safety system automatically moves the cabin to the nearest floor and opens the doors, allowing passengers to exit safely.
Choosing the Right Installation Partner in Bangalore
Proper spatial engineering is the foundation of a safe, high-performing home lift. When evaluating potential elevator manufacturers and suppliers in Bangalore, prioritize partners who provide detailed technical submittals, clear structural site-readiness checklists, and collaborative engineering support.
Local Manufacturing & Spare Parts Support
A strong local manufacturing and support network helps ensure faster installation timelines, better spare parts availability, and reduced downtime if maintenance is required.
Dual-Technology Expertise
Look for manufacturers that offer both hydraulic and traction systems. Companies with expertise in multiple technologies can recommend solutions based on your home's structure and requirements rather than promoting a single product line.
Safety Standards & Certifications
Verify that the elevator complies with recognized safety standards and includes essential features such as:
- Automatic Rescue Device (ARD)
- Emergency communication systems
- Door safety sensors
- Overload protection
- Battery backup systems
Service Coverage & Response Time
Reliability of service support often becomes more important than small differences in upfront pricing. Before purchasing, verify how quickly local emergency service technicians can respond to your neighborhood.
Evaluating Local Manufacturers
Bangalore homeowners have access to several established elevator manufacturers and suppliers. When comparing providers, focus on engineering expertise, service capabilities, manufacturing quality, safety standards, and long-term maintenance support rather than price alone.
Among Bangalore-based manufacturers, Teknix Elevators provides CAD drafting support, architectural coordination, site-readiness assessments, and installation services for residential elevator projects. Operating from its Bangalore-based engineering facilities, their technical teams work collaboratively with homeowners, architects, and civil contractors to execute custom project plans. Homeowners should compare multiple providers to identify the most suitable solution for their property's layout, budget, and long-term accessibility requirements.